DIY Outdoor Rug
We have a huge deck and I desperately needed something to break it up that wouldn’t break up the bank. Enter this awesome DIY solution made in only a few hours and under $100.
The “rug” is actually a roll vinyl (what we often call linoleum) remnant from the store. I purchased a very large remnant for $65 which we used part of to make our DIY hopscotch mat which turned out fabulous.
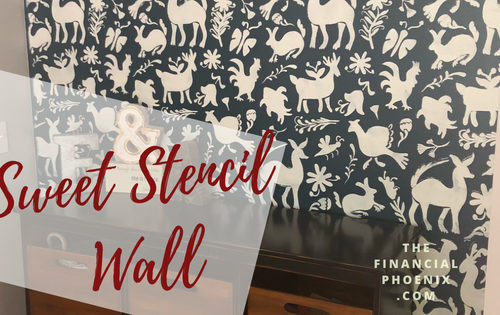
You may recall this is my third stencil project so let’s recap for a moment. The first was the DIY Floor for my Girls Bathroom, the second was an adorable stenciled feature wall in they playroom.
Disclosure: some of the links below are affiliate links, meaning, at no additional cost to you, I will earn a commission if you click and make a purchase
Click here for the bathroom floor stencilClick here for the feature wall stencil
Does this mean I’ve officially crossed into stencil obsession? I wish I had all the stencils from Royal Design Studio and keep thinking of other projects to tackle.
I, of course, decided to tackle this project at the wrong time of year. Leaves were falling, nights were chilly but I had committed to completing it and had it laid out and ready on the deck. Initially I had contemplated trying to stain the background with some brown paint watered down but I was fortunate that nature did the work for me. The remnant was lying out there for a couple weeks and the back became discolored by a dirty dog, muddy boots, and black walnuts. Perfect.
It’s been a rough few weeks at my real job and this project gave me some much needed time to decompress. Most of the work was done at night illuminated by a work light, it was cold, damp, and blessedly quiet.
Disclosure: some of the links below are affiliate links, meaning, at no additional cost to you, I will earn a commission if you click and make a purchase
The Stencil
I used the Anatolia Floor Stencil from Royal Design Studios. I love their designs and quality. The stencil arrived quickly, rolled, and in perfect condition. They include a number of papers including clear but simple instructions on how to stencil. They also have a number of tutorials available on their website.
Step 1: Wash
Just as with the Hopscotch Mat I chose to use the back of the linoleum. I liked that it was a uniform surface and is rather absorbent prior to being sealed. My thought is that it will hold up better to the elements than trying to get paint to adhere to a pre-finished surface.
Since the sheet was outside for a few weeks I sprayed off the back and used a push broom to help “scrub” it clean. I have read many people use TSP to clean prior to painting. I did not but felt confident it was clean enough.
Step 2: Layout
Layout the stencil pattern to ensure the edges are terminating somewhere acceptable for you. I eyeballed the middle of the sheet and then let the stencil lay over the edge a bit. This is a busy stencil so your eyes will not be drawn to minor inconsistencies.
Step 3: Paint!
I used a stencil brush with a can of mistint paint from my local Sherwin Williams ($5). Use a dry brush technique and dap the brush vertically until you have covered the stenciled area. I have stenciling instructions in my DIY floor tutorial.
Step 4: Move and Repeat
Move the stencil and line up the corresponding points on the previous stenciled area, repeat painting. The whole mat (12″ x 11″) took be just over an hour and that was repeatedly stopping to admire the work.
Step 5: Seal
I used 3 coats of untinted, deep tint porch paint. Without tint, the base dries clear. Many other tutorials I read used a poly acrylic sealer but their floor cloths were inside and I was concerned about the durability in the elements. So far the hopscotch mat has held up well so I think this mat is promising as well.
Step 6: Enjoy
Doesn’t it look fabulous?! I love that it looks like an old floor. The table was a last minute addition and with super simple plans only took an afternoon to build. I am so excited do more with our outdoor space next summer. Where can you use this? I am thinking a “rug” for under the dining room table- easy to clean but soft on the feet!
[ctct form=”4″]


